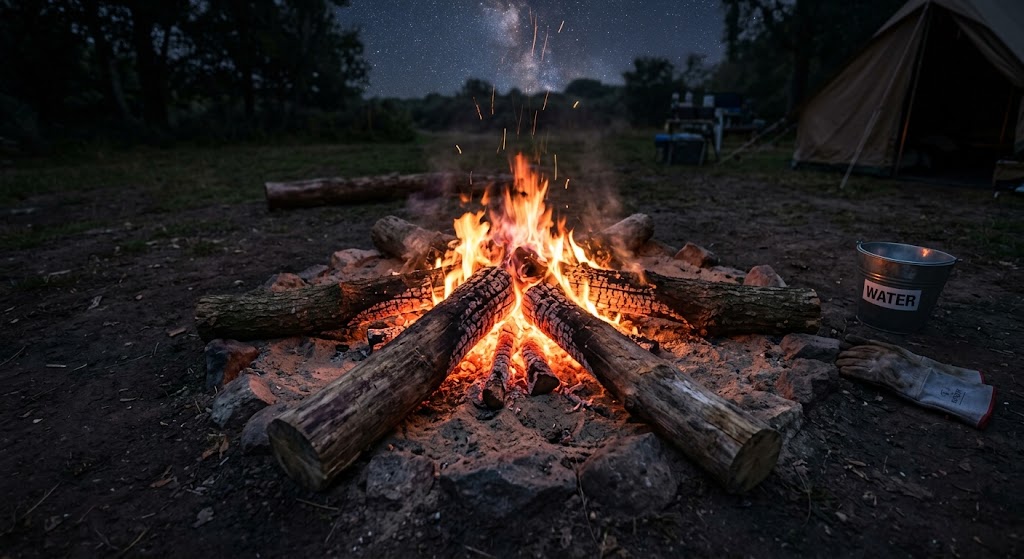
Challenge 105: Build Your First Cooking Fire
This Pure Bushcraft Challenge takes you through the process of preparing and building a simple cooking fire from start to finish. You’ll choose a suitable location, prepare your materials, build your fire, light it, manage it and use it for simple outdoor cooking before leaving the site safe.
This isn’t about building the biggest fire or doing everything as quickly as possible. The aim is to practise good habits, make sensible decisions and become more confident working with fire outdoors.
What You’ll Do
By the end of the challenge, you will have practised how to:
- choose a suitable location for a cooking fire
- prepare a safe working area
- select and organise tinder, kindling and fuel
- build a simple fire suitable for cooking
- light the fire safely
- manage the fire as it develops
- prepare the fire for simple cooking
- control the fire while cooking
- extinguish the fire properly
- check that the fire site has been left safe
Before You Start
This challenge is designed for people who have already worked through the relevant Fire Mastery lessons and understand the basic principles of fire safety.
You should be comfortable handling firelighting equipment safely and understand that conditions, local rules and the location you’re using can all affect whether a fire is appropriate.
Only carry out the challenge where fires are permitted and where you have suitable permission. Check local restrictions, weather conditions and any fire-risk warnings before starting.
Never leave a fire unattended, and make sure it is completely extinguished before leaving the area.
What You’ll Need
You’ll need:
- a safe and permitted location for an outdoor fire
- suitable tinder
- dry kindling
- suitable fuel wood
- a safe means of lighting the fire
- a fire-safe cooking method or suitable cooking equipment
- water for extinguishing the fire
- gloves or other appropriate protection if required
- basic food and utensils for a simple cooking task
Keep the equipment simple. The purpose of the challenge is to practise your fire skills rather than rely on complicated equipment.
Take the Challenge
1. Choose Your Location
Before collecting materials or lighting anything, stop and assess the site.
Look at the ground, surrounding vegetation, nearby trees, overhanging branches and anything else that could be affected by heat, sparks or smoke. Think about wind direction as well as where people will be moving around the campsite.
Make sure the fire is positioned safely away from tents, equipment and other combustible materials.
If the location doesn’t feel suitable, don’t try to make it work. Choose somewhere else.
2. Prepare the Fire Area
Prepare the area before you begin building the fire.
Remove loose combustible material where appropriate and create a stable, controlled space for the fire. Make sure you have enough room to work safely and that you have water available before lighting anything.
This is also the point to think about how you will extinguish the fire later. Good firecraft starts with the end of the fire in mind.
3. Prepare Your Materials
Organise your materials before lighting the fire.
Separate your tinder, kindling and larger fuel so that everything you need is ready when you need it. Your tinder should be capable of catching the initial flame, while the kindling should be arranged so that the fire can develop gradually.
Don’t wait until the fire is burning to discover that your next materials aren’t ready.
4. Build Your Fire
Build a simple fire suitable for the cooking task you have planned.
Keep the structure open enough for air to reach the developing fire and arrange your materials so that you can gradually increase the size of the fuel as the fire establishes.
You are not trying to create a huge flame. A controlled fire that produces useful heat is far more valuable for cooking than an oversized fire that is difficult to manage.
5. Light the Fire
Take a moment before lighting to check the area one more time.
Make sure your lighting method is ready, your materials are positioned correctly and you have a clear route to move away from the fire if necessary.
Light the tinder carefully and allow the fire to develop rather than immediately adding large pieces of fuel.
Watch what happens.
If the fire struggles, work out why. Is the tinder suitable? Is there enough airflow? Is the material too damp? Have you added fuel too quickly?
This is where your earlier lessons start to become useful.
6. Build the Fire Up
Once the initial flame is established, gradually introduce your kindling and then larger fuel.
Build the fire according to what it needs rather than simply adding more wood.
A good fire should be manageable. You should be able to control its size and position rather than constantly fighting against it.
7. Prepare for Cooking
Once the fire has developed sufficiently, prepare your cooking equipment.
Think about where your cooking vessel will sit, how you will support it and how you will control the heat.
For this challenge, keep the cooking task simple. The objective is to practise controlling the fire while cooking, not to produce an elaborate meal.
8. Cook Something Simple
Now use the fire for its intended purpose.
Keep an eye on the fire throughout the cooking process. Adjust the fuel and cooking position as necessary rather than allowing the fire to grow unnecessarily.
This is an important part of the challenge because cooking changes the way you think about a fire. You are no longer simply trying to keep flames burning. You are managing heat for a specific purpose.
9. Finish the Fire Safely
When you’ve finished cooking, don’t simply walk away from the fire.
Allow it to reduce safely and follow your chosen site’s fire-extinguishing procedure. Use water where appropriate and continue checking until there is no remaining heat or risk of the fire restarting.
Don’t rely on the fire looking extinguished from a distance.
10. Leave No Fire Behind
Before leaving, inspect the entire fire area.
Check for remaining embers, hot material, sparks and anything that could cause the fire to restart. Make sure the area has been left as safely and responsibly as possible.
The final part of a good fire is putting it out properly.
Check Your Results
Before considering the challenge complete, review how the fire performed.
Ask yourself:
- Did I choose a location where fires were permitted and safe?
- Was all my tinder and kindling prepared before lighting?
- Did the tinder ignite without excessive difficulty?
- Did I build the fire lay with sufficient airflow?
- Could I increase the fire’s size gradually without losing control?
- Did I develop a manageable fire suitable for cooking?
- Could I position cookware safely, if I tested it?
- Did I extinguish the fire completely and leave the site safe?
Think about what went well and what you would change next time. If the fire struggled, identify the likely cause. Damp materials, poor airflow and adding larger fuel too soon are common problems.
You do not need a perfect result on your first attempt. The important thing is to understand the process, recognise problems and work safely.
Complete the Challenge
To complete this challenge, you must:
- Build and light a small outdoor cooking fire where fires are permitted.
- Demonstrate that you can feed and manage it safely.
- Establish a controlled fire suitable for cooking, ideally with a useful bed of embers.
- Extinguish it completely and leave the site safe.
If conditions are unsuitable for lighting a fire, do not take unnecessary risks just to finish the challenge. Practise preparing your fire lay without ignition and attempt the full challenge when you have a safe, permitted opportunity.
How to Submit Your Challenge
Once you have completed the challenge, log in to your Pure Bushcraft account and visit your member profile’s Social Activity section or Photo Gallery.
Post photographic evidence showing your progress. Your photographs should demonstrate your prepared fire lay, your controlled cooking fire and, where practical, the completed and extinguished fire site.
Include the exact hashtag:
#PureBushcraftChallenge105
Make sure your post clearly explains what you did and what you learned. Take photographs only when it is safe to do so; never leave a fire unattended to get a picture.
Challenge 105 Checklist
Want to Push Yourself?
Once you are comfortable building a basic cooking fire, challenge yourself to improve your efficiency and control.
On a future attempt, prepare your tinder and kindling more carefully, use less fuel, or practise maintaining a steady bed of embers without allowing the fire to grow unnecessarily large.
You could also compare how different sizes of dry wood affect the fire’s behaviour, keeping the fire small and within the limits of your permitted site. Observe how the fuel burns, how quickly it produces embers and how easily you can regulate the heat.
Always change one thing at a time so that you can identify what makes the biggest difference. Good bushcraft is about understanding your materials and conditions, not simply making fire.
What’s Next?
In Challenge 104, you demonstrated a suitable method of securing loose cordage to prevent tangles during storage. If you have not completed it yet, you can return to it whenever you wish; Pure Bushcraft challenges can be completed in any order.
Keep building your practical skills, take your time with each challenge and focus on developing techniques you can use safely and confidently outdoors.
Once you’ve shared your evidence and it has been verified, the Pure Bushcraft Outdoor Skills Challenge 105 is complete and the completed challenges figure will be updated on your profile.
🔒Ready to test your survival skills?
Join Pure Bushcraft for free, complete challenges, earn badges and increase your Survival Level.
JOIN FREE →
CRAIG BURR
FOUNDER · PURE BUSHCRAFT
I'm Craig, the person behind Pure Bushcraft. I created Pure Bushcraft because I wanted somewhere people could learn real outdoor skills in a practical, straightforward way — from lighting a fire and tying knots to navigation, campcraft and everything in between.
You can read more about the story behind Pure Bushcraft here as well as our approach here.