
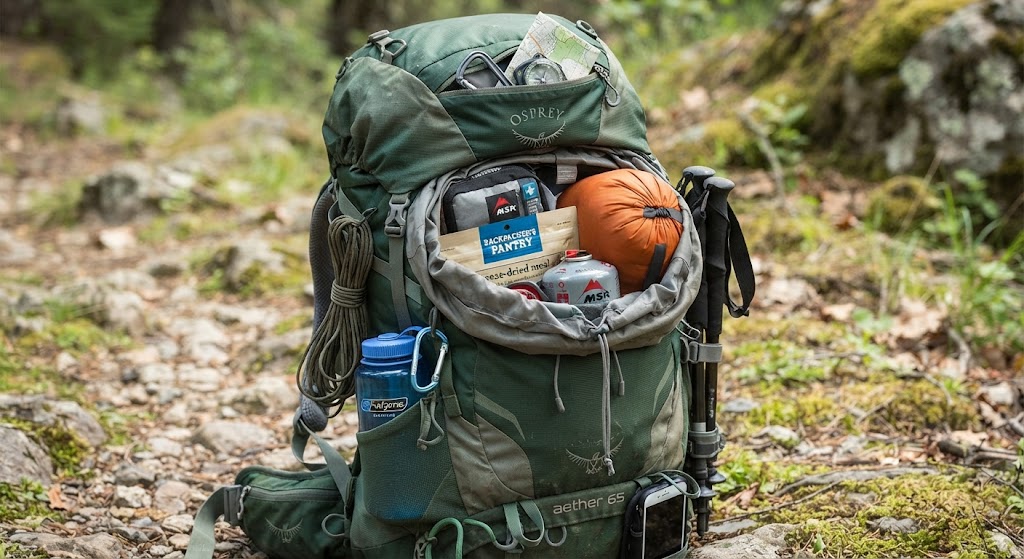
SGUK Outdoor Skills Challenge 82: Weigh Each Item in Your Kit
Have you ever packed your bag for a day outdoors and wondered why it feels heavier than expected? Individual items might not seem particularly weighty, but when you add your shelter, spare clothing, food, water and other equipment together, the total can be surprising.
Knowing the weight of your equipment helps you understand what you are carrying, make better decisions about what to pack and identify opportunities to reduce unnecessary weight without sacrificing essential safety equipment. It is a useful skill whether you are heading out for a short walk, planning a weekend camp or preparing for a longer expedition.
Your Challenge
Weigh every item in your outdoor kit, record the results and calculate the combined weight of your equipment.
Your aim is to build an accurate picture of what you carry and understand how individual items contribute to the overall load. You should also identify which items are essential, which serve several purposes and whether there are any sensible opportunities to make your kit lighter.
You do not need expensive ultralight equipment or specialist weighing instruments. An ordinary set of kitchen scales or luggage scales will be enough for most items.
What You’ll Need
- Your usual outdoor kit, or the equipment you would take on a planned trip.
- A set of digital kitchen scales, luggage scales or another suitable weighing scale.
- A notebook, spreadsheet or phone to record your results.
- A calculator, if you need help adding the weights together.
- Your existing packing list, if you have one.
Choose a representative selection of equipment. If you have a rucksack packed for a real trip, you can weigh its contents individually. Alternatively, lay everything out as though you were preparing for your next outing.
Use grams for smaller items and kilograms for heavier equipment if that makes weighing easier, but convert everything to the same unit before calculating your final total. One kilogram equals 1,000 grams.
Do not unpack or handle equipment in a way that creates a hazard. Keep knives and other sharp tools safely sheathed, leave fuel containers closed and follow the manufacturer’s instructions for any equipment that requires special handling.
Take the Challenge
1. Empty your kit and organise the contents
Start by laying your equipment out on a clean, dry surface. If you normally carry everything in a rucksack, empty it completely so that you can see exactly what is inside.
Group similar items together. You might have clothing in one pile, cooking equipment in another, and navigation, first aid and personal items arranged separately.
This first step often reveals things that are easy to overlook: an old snack wrapper, a spare item you forgot you had packed, duplicate equipment or something left in a pocket after your previous trip.
Do not remove anything yet simply because it looks unnecessary. The purpose of this challenge is to understand your existing kit before deciding whether anything needs to change.
Include the rucksack itself in your inventory. Its weight is part of the load you carry, even though it does not contain any of your equipment.
2. Weigh each item individually
Take your first item and place it on the scales. Record its weight alongside its name, then repeat the process for every other item.
For small objects, kitchen scales will usually provide a convenient reading in grams. For larger equipment, such as a rucksack or tent, use suitable scales that can accommodate the item safely.
If you need to weigh something using a container, weigh the empty container first and subtract its weight from the combined reading. Some digital scales have a tare function that allows you to reset the display to zero after placing the empty container on them.
Be consistent about what you are weighing. For example, if you record your sleeping bag without its storage sack, do not later compare that figure with another sleeping bag whose weight includes its sack. Ideally, record the complete item as you actually carry it.
For equipment made up of several parts, decide whether it makes more sense to weigh the complete set or each component separately. A cooking system, for example, might include a pot, lid and handle. Recording the complete system gives you its practical carrying weight, while individual measurements can help you understand where that weight comes from.
Make sure your readings are sensible. If a small torch appears to weigh several kilograms, check the scales, units and recorded figure before moving on.
3. Build an equipment weight list
Create a simple inventory with three columns: item, weight in grams and category.
Your list could look something like this:
| Item | Weight (g) | Category |
|---|---|---|
| Rucksack | Record yours | Carrying |
| Waterproof jacket | Record yours | Clothing |
| Spare socks | Record yours | Clothing |
| First aid kit | Record yours | Safety |
| Head torch | Record yours | Lighting |
| Map and compass | Record yours | Navigation |
| Water container | Record yours | Hydration |
| Food for the trip | Record yours | Food |
| Shelter | Record yours | Shelter |
| Sleeping bag | Record yours | Sleeping equipment |
These are examples of items to consider, not a recommended packing list for every trip. Your equipment will depend on the activity, duration, season, weather, location and level of experience.
Record the actual weights you measure rather than copying figures from an online equipment review. Manufacturers’ specifications can be useful for comparisons, but the weight of the complete item you carry may differ from a quoted minimum weight.
Include the containers, cases, bags and accessories you normally take with each item. A piece of equipment that looks light on its own can become heavier once its supporting components are included.
4. Calculate the total weight of your equipment
Once you have weighed everything, add the figures together.
If you have recorded your equipment in grams, divide the final total by 1,000 to convert it into kilograms.
For example, if the combined weight of your equipment is 7,500 grams, your kit weighs 7.5 kilograms.
This is an illustrative calculation, not a target weight for your own equipment.
Keep a separate figure for the empty rucksack if you want to understand how much weight comes from the bag itself. You can then calculate the combined weight of the rucksack and its contents.
It is also useful to distinguish between the weight of your packed equipment and the total load you will carry on the trip. Water, food and fuel may change as you travel, so make sure you understand which items are included in each figure.
Water is particularly important because one litre weighs approximately one kilogram before accounting for the container. If you are planning a route where you will need to carry several litres, that can make a substantial difference to your starting load.
Do not reduce your water supply simply to make the numbers look better. Plan hydration around the route, conditions, duration and availability of safe drinking water.
5. Identify your heaviest items
Look through your inventory and identify the five heaviest individual items.
Write them down in order, from heaviest to lightest. Then consider why each one is necessary and whether its weight is reasonable for the job it performs.
Your shelter, sleeping system and rucksack might account for a significant proportion of your load, but this will vary considerably depending on what you own and the type of trip you are planning.
A heavier item is not automatically a poor choice. A robust shelter may be appropriate for exposed conditions, while a larger first aid kit may be justified for a particular group or expedition. Comfort, durability, reliability and suitability matter alongside weight.
Instead of asking only whether something is heavy, ask whether its weight is justified by its purpose.
This is where weighing your kit becomes more than a simple exercise in arithmetic. You begin to see the relationship between the equipment you choose and the demands of the activity you intend to undertake.
6. Look for sensible opportunities to save weight
Now review your list and identify at least three possible ways to reduce unnecessary weight, if suitable opportunities exist.
You might discover that you regularly carry two items that perform the same function, that a particular accessory is not needed for your planned activity, or that an item has a lighter alternative that would still meet your requirements.
Multi-purpose equipment can sometimes reduce the total load, provided it performs each required job properly. A combined navigation tool, for example, may replace separate items in some circumstances, but you should still consider reliability and backup arrangements.
You could also compare the weight of different items you already own, such as two water containers or alternative clothing layers.
However, do not remove essential safety equipment, suitable clothing, necessary food or adequate water just to achieve a lower figure. Nor should you replace dependable equipment with something unsuitable simply because it weighs less.
If you cannot identify three safe and practical changes, record the opportunities you did find. Recognising that your current equipment is appropriate is a valid outcome.
7. Repack and check your figures
Once you have finished weighing everything, return the equipment to your rucksack and check that your inventory accounts for what you have packed.
Make sure that important items remain accessible and that heavier equipment is packed in a way that suits your rucksack and the terrain you expect to encounter. Follow the manufacturer’s advice on loading and adjusting your pack.
Check that fragile equipment is protected, sharp tools are secured and liquids are properly contained.
If you are preparing for a real trip, review your equipment against the route, weather forecast, duration and any specific hazards. Your recorded weight is useful only when the kit itself is suitable for the conditions.
Finally, record your total and the date of your assessment. If you change your equipment later, you can weigh it again and compare the results.
Check Your Results
Review your inventory and answer the following questions:
- Did you weigh every item you intended to carry, including the rucksack?
- Did you record all the weights in a consistent unit?
- What were your five heaviest items?
- What was the combined weight of your equipment?
- Did you distinguish between equipment weight and the weight of consumables such as food and water?
- Can you identify any items that could be removed, combined or replaced without compromising safety?
- Did you identify any equipment whose weight is justified by its purpose?
- Have you recorded your results so that you can compare them with a future assessment?
If your total seems unexpectedly high, check your arithmetic and make sure you have not accidentally counted an item twice. If it seems unusually low, check whether you have included the rucksack, containers and accessories.
There is no single ideal pack weight that suits every person or activity. Your fitness, experience, trip length, terrain and equipment requirements all influence what you should carry.
The important result is an accurate inventory and a better understanding of your own kit.
Complete the Challenge
To complete this challenge, weigh every item in your chosen outdoor kit, record the individual measurements and calculate the combined weight.
Your assessment must identify your five heaviest items and include at least three potential weight-saving opportunities where practical, together with an explanation of why any proposed changes would remain suitable for the intended activity.
Keep your completed inventory as a useful reference for future trips. You can use it to compare equipment, plan your packing and check whether changes you make actually reduce the overall load.
You do not need to buy lighter equipment or achieve a particular total to complete the challenge. The aim is to understand what you carry and make informed decisions about it.
How to Submit Your Challenge
Submit your evidence
Take a clear photograph of your equipment laid out for weighing, alongside your written inventory or a visible record of your results. Your photograph should help demonstrate that you have completed the assessment.
You do not need to photograph every individual weighing. A well-organised photograph of your equipment and a readable record of the measurements are sufficient to show the work you have done.
Then follow these steps:
- Go to your SGUK member profile.
- Open Social Activity.
- Upload your photograph of the equipment and weight record.
- Add the hashtag #SGUKChallenge82 to your post.
- Share it for verification.
Your evidence should show your own work. Do not put yourself at risk or unpack essential equipment in an unsuitable location just to obtain a photograph. You can complete the weighing safely at home before sharing your results.
Challenge 82 Checklist
Want to Push Yourself?
Repeat the challenge with a kit list for a different outdoor activity. For example, compare what you would carry on a short summer walk with the equipment required for an overnight camp in colder weather.
Calculate the difference between the two totals and identify which additional items account for most of the extra weight. Consider whether the difference comes from shelter, sleeping equipment, clothing, food, water or other activity-specific requirements.
You could also compare two versions of your existing kit: your normal arrangement and a revised arrangement that uses equipment you already own. Record the difference in grams and as a percentage of the original equipment weight.
To calculate the percentage reduction, subtract the revised weight from the original weight, divide the difference by the original weight and multiply by 100.
For example, reducing a kit from 8 kg to 7.6 kg saves 0.4 kg, equivalent to a 5% reduction. These figures are illustrative only.
For an additional challenge, ask an experienced outdoor companion to review your inventory. See whether they identify any overlooked items, unnecessary duplication or important equipment that you have mistakenly treated as optional.
The aim is not to win a competition for the lightest rucksack. It is to develop the judgement to carry what you need, understand the consequences of your choices and prepare appropriately for the conditions ahead.
What’s Next?
Before moving on to another skill, revisit SGUK Outdoor Skills Challenge 81: Check Your Boots’ Tread Before Winter. Your equipment is only part of your preparation, and checking your footwear is an important step towards making sure your kit is suitable for the ground and conditions you expect to encounter.
You can complete SGUK Outdoor Skills Challenges in any order, so feel free to explore other challenges that interest you or return to earlier ones to practise your skills.
Once you’ve shared your evidence and it has been verified, the SGUK Outdoor Skills Challenge 82 is complete and the completed challenges figure will be updated on your profile.
🔒Ready to test your survival skills?
Join Survival Guides UK for free, complete challenges, earn badges and increase your Survival Level.
JOIN FREE →
CRAIG BURR
FOUNDER · SURVIVAL GUIDES UK
I'm Craig, the person behind Survival Guides UK. I created SGUK because I wanted somewhere people could learn real outdoor skills in a practical, straightforward way — from lighting a fire and tying knots to navigation, campcraft and everything in between.
You can read more about the story behind SGUK here as well as our approach here.


