Pure Bushcraft Outdoor Skills Challenge 99: Tie a Clove Hitch Under Tension
A clove hitch is a useful knot for attaching a rope to a pole, but tying it is only part of the skill. You also need to understand how it behaves when the rope is pulled, how to dress the knot correctly and how to recognise when it begins to slip.
For this challenge, you’ll attach a pole using a clove hitch, apply a steady hand load and inspect the knot throughout the test. The aim isn’t to pull as hard as possible. It’s to create a secure attachment, test it in a controlled way and understand the knot’s limitations.
Your Challenge
Tie a clove hitch around a suitable pole and maintain the attachment while applying a steady hand load to the rope.
You must demonstrate that you can:
- Tie the clove hitch correctly around a pole.
- Dress the knot so its turns sit neatly together.
- Apply a controlled load without jerking the rope.
- Observe whether the knot moves or loosens.
- Explain why a clove hitch may not be the best choice for every load or situation.
Your knot should remain in place during the test, without obvious slipping or loosening. Remember that a clove hitch can move along a smooth pole, particularly when the rope is loaded in an unfavourable direction. Passing this challenge does not make it suitable for life-safety applications or heavy loads.
What You’ll Need
- A length of sound rope, approximately 2–3 metres long.
- A sturdy, stationary pole or rounded wooden post.
- A clear space where you can work without tripping over the rope.
- A way to record your attempt, such as a photograph.
Choose a pole that cannot fall, roll or swing towards you. A firmly secured post or a suitable fixed outdoor structure is ideal. Avoid leaning branches, loose fencing, unstable furniture and anything that could topple if the knot slips.
Use ordinary rope suitable for practising knots. Inspect it for cuts, fraying and other damage before starting. Do not use thin, brittle cord that may cut into your hands, and avoid sharp or splintered poles.
You do not need to use a tree. If you practise outdoors, don’t tie the rope tightly around a living tree or damage its bark. A suitable fixed post is a better option.
Take the Challenge
1. Understand the clove hitch
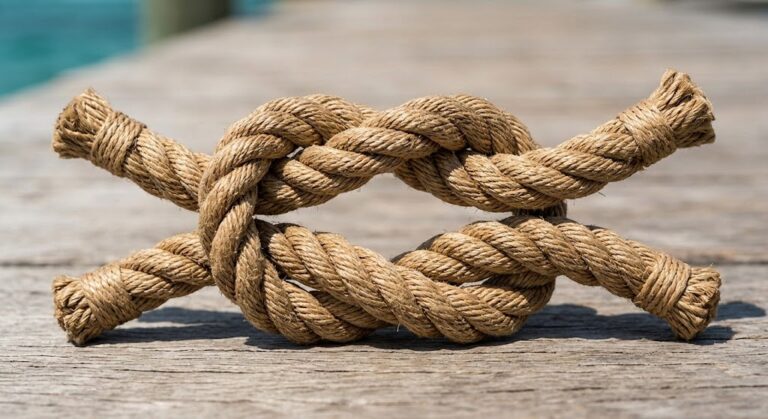
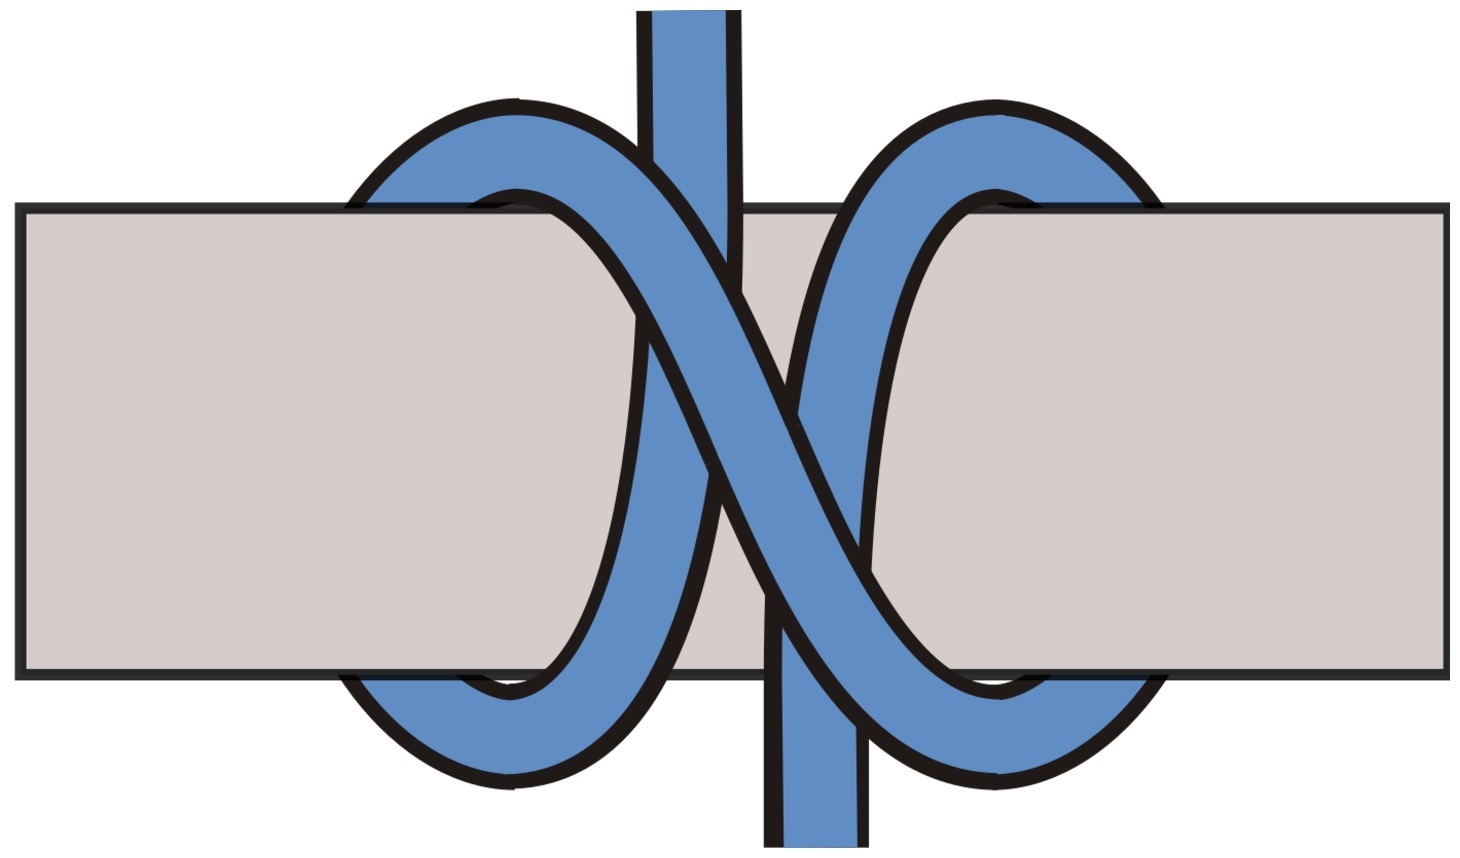
A clove hitch consists of two turns around a pole, arranged so that the rope crosses over itself in the correct way. When dressed properly, the turns sit neatly against one another and the crossing forms the recognisable shape of the knot.
It is often used to attach a rope to a post or pole, especially when the rope needs to be put on quickly. However, it is not a universal securing knot. It can slip on smooth or tapered surfaces, and its performance depends on the rope, pole, direction of pull and changing load.
Before you begin, examine the pole and decide where the rope will sit. Choose a section that is reasonably uniform in diameter, with no sharp edges or features that could damage the rope.
2. Tie the clove hitch around the pole
One straightforward method is to form the hitch directly around the pole.
- Pass the rope around the pole, leaving a useful length of free end.
- Bring the working end across the standing part of the rope to form a crossing.
- Take the working end around the pole again, making a second turn.
- Feed the working end beneath the rope section created by the second turn, so it lies trapped beneath the crossing.
- Pull the two rope sections in opposite directions to tighten the knot gently.
The exact appearance depends on how you approach the pole, so don’t rely on the number of turns alone. Check that the finished knot has the characteristic crossed arrangement of a clove hitch, rather than a pair of loose, unrelated loops.
If the knot looks twisted, uneven or difficult to tighten, undo it and start again. Learning to recognise the finished shape is more useful than memorising movements without understanding what they produce.
3. Dress the knot carefully
Before applying any load, arrange the rope so the two turns sit neatly together. Remove obvious slack and make sure the crossing is clear rather than tangled.
A well-dressed knot is easier to inspect. You should be able to see where the rope crosses itself and how the turns bear against the pole.
Check that the working end is long enough to remain visible throughout the test. Don’t trim it short, tuck it out of sight or assume that a knot which looks tidy must be secure.
Take a photograph of the unloaded knot if you want to compare its position after the test. This gives you a useful reference for spotting movement.
4. Set up a controlled hand-load test
Stand in a stable position with the pole between you and the rope arranged so that a slipping knot cannot cause the pole to strike you. Keep your face and body out of the likely path of the rope and pole.
Hold the free rope securely and take up the slack gradually. Apply a steady, moderate pull by hand, using a smooth movement rather than a sudden jerk.
The purpose is to observe the knot under a modest, controlled load, not to discover its breaking point. Do not lean your full body weight onto the rope, suspend yourself from it, attach heavy objects or use a mechanical device to increase the force.
Keep your hands away from the knot while it is loaded. If the rope starts to slide, ease off the pressure rather than trying to grab or tighten the moving knot under tension.
5. Maintain the attachment under tension
Once you have applied a steady hand load, hold it briefly while observing the knot. Look for changes in its position, shape and tightness.
Ask yourself:
- Is the knot still sitting where you tied it?
- Have the turns moved along the pole?
- Has the crossing loosened or changed shape?
- Is the working end moving through the knot?
- Is the rope rubbing against a sharp edge or becoming damaged?
If the knot remains in place, gradually release the load and inspect it again. A knot that looks secure while pulled may become loose once the tension is removed.
If it slips, stop the test. Check whether the pole was too smooth, the rope was poorly suited to the surface, the knot was incorrectly tied or the pull encouraged the hitch to travel along the pole. Correct the problem and try again with a suitable setup.
Do not simply pull harder to force the knot to hold. That defeats the purpose of a controlled test and can make a failure more dangerous.
6. Repeat the test and compare your results
Untie the clove hitch completely and tie it again from the beginning. Repeat the same moderate hand-load test, keeping the setup as consistent as possible.
Aim for three successful attempts. Each time, check the knot before loading it, observe it during the pull and inspect it afterwards.
If it slips on one attempt but holds on another, don’t dismiss the failure. Consider what changed. You may have dressed the knot differently, left more slack or placed it on a slightly different part of the pole.
The challenge is about repeatable technique, not getting lucky with a single attempt.
Check Your Results
You have completed the practical test when you can answer these questions honestly:
- Did you tie a recognisable clove hitch correctly?
- Were the turns neat and properly dressed before loading?
- Did you apply a steady hand load without jerking or using your body weight?
- Did the knot remain attached without obvious slipping during the test?
- Did you inspect it both under load and after releasing the tension?
- Could you explain at least one situation in which a clove hitch might slip or be unsuitable?
If the knot moved significantly or loosened during any attempt, practise again before claiming a successful result. You can still learn from the attempt, but record what happened accurately.
A successful test only demonstrates that the knot held under the particular conditions you used. It does not establish a safe working load, guarantee performance with another rope or pole, or prove that the hitch will remain secure under repeated movement or changing forces.
Complete the Challenge
To complete this challenge, tie the clove hitch around a suitable pole, apply a controlled and steady hand load, and demonstrate that the attachment remains in place during the test.
Take a clear photograph showing the finished knot on the pole. If possible, photograph the knot after the test as well, so you can compare its position and condition.
Before moving on, make sure you can tie the hitch again without relying on a diagram at every step. Understanding the structure of the knot will help you recognise mistakes and decide when a different knot would be more appropriate.
How to Submit Your Challenge
- Log in to your Pure Bushcraft account.
- Visit your member profile and open the Social Activity section.
- Create a post with a photograph showing your clove hitch attached to the pole.
- Include the hashtag #Pure BushcraftChallenge99 in your post.
- Briefly explain how you tested the knot and whether it held without slipping.
Be honest about the result. If your knot slipped during an early attempt but held after you corrected your technique, you can describe what you changed. The point is to demonstrate learning and practical skill, not to pretend every attempt works first time.
Your submission will be checked before the challenge is marked as verified.
Challenge 99 Checklist
Want to Push Yourself?
Once you can tie the clove hitch reliably, explore how it behaves in different controlled practice conditions.
Try it on two suitable poles with different surface textures, such as a smooth finished post and a rougher, sound wooden post. Keep the load modest and use the same rope, technique and pulling direction. Record whether the knot behaves differently.
You can also practise tying the hitch from the opposite approach around the pole. The finished knot should still have the correct structure. This helps you become more comfortable tying knots when access is awkward or the rope approaches from a different direction.
Finally, learn when not to use a clove hitch. For an attachment that must not slip, a different knot or a properly designed fastening may be more appropriate. For any activity involving people, suspended loads or serious consequences if the attachment fails, use a suitable system and established safety procedures rather than relying on this practice test.
What’s Next?
For your next step, revisit Pure Bushcraft Outdoor Skills Challenge 98: Make Bread Dough, Let It Rise and Cook It on a Stick if you haven’t completed it yet. Pure Bushcraft Challenges can be completed in any order, so you can also move on to another practical skill that interests you.
Keep building your outdoor knowledge by practising knots, understanding their limitations and learning to choose the right technique for the job.
Once you’ve shared your evidence and it has been verified, the Pure Bushcraft Outdoor Skills Challenge 99 is complete and the completed challenges figure will be updated on your profile.
🔒Ready to test your survival skills?
Join Pure Bushcraft for free, complete challenges, earn badges and increase your Survival Level.
JOIN FREE →
CRAIG BURR
FOUNDER · Pure Bushcraft
I'm Craig, the person behind Pure Bushcraft. I created Pure Bushcraft because I wanted somewhere people could learn real outdoor skills in a practical, straightforward way — from lighting a fire and tying knots to navigation, campcraft and everything in between.
You can read more about the story behind Pure Bushcraft here as well as our approach here.