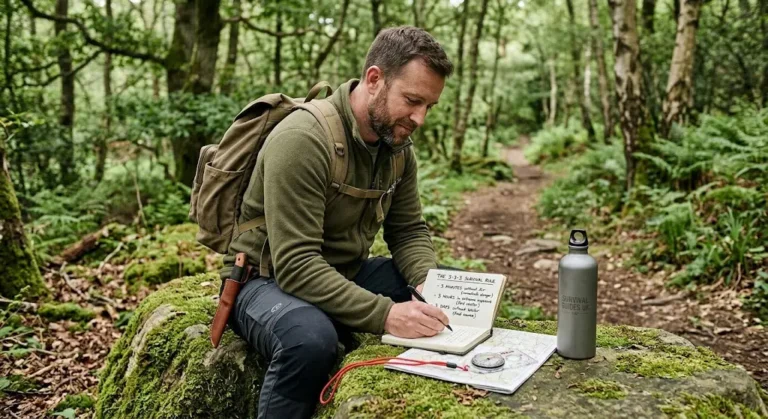
SGUK Outdoor Skills Challenge 78: Plan a Route in the Dark
Navigating after dark can feel very different from walking the same route during daylight. Familiar landmarks become harder to recognise, your field of vision is reduced, and it is easier to miss junctions or take a wrong turn. Good night navigation starts before you leave, with a route that you understand and a plan for what to do if conditions change.
For this challenge, you’ll plan a short route that could be followed after dark, using a map, navigation tools and information about the ground you’ll be crossing. You don’t need to walk it at night to complete the planning exercise, although you can arrange a suitable supervised walk if you have the experience and conditions to do so safely.
Your Challenge
Plan a realistic route that could be followed safely after dark. Identify the start and finish points, mark the route on a map, and choose clear checkpoints that will help you confirm your position along the way.
Your route should use suitable paths or tracks, avoid unnecessary hazards and include a sensible alternative if you cannot continue as planned.
The aim isn’t to create the longest route. It’s to show that you can think ahead, understand the limitations of navigating at night and make sensible decisions before setting off.
What You’ll Need
- A suitable map of your chosen area, preferably an Ordnance Survey map or a reliable offline mapping resource.
- A pencil and paper, or a digital tool for marking your route.
- A compass if you’re using a map that requires one for navigation.
- A torch or headtorch for checking your equipment and map in low light.
- Information about local access restrictions, path conditions and any relevant hazards.
You can complete the planning at home. If you later walk the route after dark, take appropriate lighting, spare batteries or a backup light, suitable clothing, a charged phone and any other equipment needed for the conditions.
Take the Challenge
1. Choose a suitable route
Select a familiar area where you can identify a clear start and finish point. For your first attempt, choose a short route on established paths, tracks or other suitable routes rather than attempting open moorland, remote hills, cliffs or unfamiliar woodland.
Check that you have permission to use the route at the time you intend to visit. Some sites close at night, and paths that appear straightforward on a map may cross private land or areas with restricted access.
Think about the terrain as well. Avoid routes that require you to cross fast-flowing water, negotiate steep exposed ground or follow the edge of cliffs in darkness.
2. Mark the route on your map
Draw or trace the route between your start and finish points. Make sure you can identify the direction of travel and the main paths, tracks or other features you intend to follow.
Write down the approximate distance and estimated walking time. Remember that a route that takes 30 minutes in daylight may take considerably longer at night because you’ll be moving more cautiously and stopping to check your position.
Don’t rely entirely on a phone screen. If you’re using digital mapping, make sure the map is available offline and consider carrying a suitable paper map and compass as a backup.
3. Choose clear checkpoints
Break the route into manageable sections and identify at least three checkpoints along the way, where the length of your route allows.
Choose features that should be easy to recognise, such as a substantial path junction, a bridge, a clearly mapped track crossing or a prominent building that you can identify from a safe public route.
Avoid relying solely on small objects, subtle changes in vegetation or distant views that may be obscured by darkness, fog or rain.
For each checkpoint, write down:
- What the feature is.
- Where it appears on your map.
- What direction you’ll travel next.
- How you’ll confirm that you’ve reached it.
A checkpoint is useful only if you can identify it with reasonable confidence. If you reach a point and the expected feature isn’t there, stop and check your position rather than guessing.
4. Identify hazards before you leave
Examine the route for features that could become more difficult after dark. These might include uneven ground, muddy sections, narrow paths, road crossings, water, steep slopes or places where several paths meet.
Mark any sections that need extra care and consider whether you can avoid them altogether. A slightly longer route on a clear, well-maintained path may be a better choice than a shorter route with difficult terrain.
Check the weather forecast and sunset time for your planned date. Fog, heavy rain, strong winds and icy conditions can make night navigation considerably more difficult. If the forecast or ground conditions make the route unsuitable, choose another route or postpone the walk.
5. Plan what you’ll do if something goes wrong
A sound route plan includes a way to respond when the original plan stops being practical.
Identify a safe place where you could turn back, and consider whether there is a straightforward alternative route to your finish point. Note any nearby roads or recognised access points that could help you explain your location if you needed assistance.
Agree on a latest finishing time if you’re walking with others, and tell someone responsible where you’re going and when you expect to return. If the plan changes, update them when it is safe and practical to do so.
If you become unsure of your position during a real night walk, stop in a safe place, check the map and retrace your steps only when you’re confident about the way back. Don’t keep walking in the hope that the route will become obvious. If you cannot establish your position or continuing would be unsafe, seek help.
6. Check your lighting and navigation plan
Before treating your route as ready, consider how you’ll read the map and identify checkpoints after dark.
A headtorch leaves your hands free, but its beam doesn’t make every hazard visible. Carry a backup light and make sure your navigation equipment is accessible without unpacking everything in the dark.
If you’re relying on a compass, practise taking bearings in daylight before attempting to use them at night. Do not assume that a compass bearing alone will keep you clear of obstacles, roads, cliffs or other hazards.
If you’re planning a group walk, make sure everyone understands the route, knows where the checkpoints are and has appropriate lighting. The person leading should be prepared to slow down, stop or turn back when necessary.
Check Your Results
Review your finished route plan and see whether you can answer these questions without having to start again.
- Can you identify your start point, finish point and intended route on the map?
- Have you marked at least three useful checkpoints, where appropriate?
- Can you explain how you’ll confirm your position at each checkpoint?
- Have you identified the main hazards and checked whether any can be avoided?
- Have you estimated the journey time realistically for night conditions?
- Do you have a backup plan if you lose your way, the weather deteriorates or you need to turn back?
- Have you checked access arrangements, the forecast and sunset time?
If you can’t answer one of these questions confidently, revise your plan. Good navigation is not about pretending you won’t make mistakes; it’s about recognising uncertainty early and knowing how to respond.
Complete the Challenge
Your challenge is complete when you have produced a route plan suitable for a potential night-time walk.
Your plan must include a marked route, start and finish points, checkpoints, estimated journey time, identified hazards and a sensible contingency plan. You should also be able to explain why the route is appropriate for darkness.
You do not have to walk the route at night to earn completion. If you decide to test it outdoors, choose a suitable familiar route, follow local access rules, take the right equipment and go with an experienced companion if you are new to night navigation. Never attempt a hazardous route simply to obtain evidence for a challenge.
How to Submit Your Challenge
Submit your evidence
Take a clear photograph of your completed map or route plan. Make sure the start and finish points, checkpoints and key planning notes can be seen. You can cover personal details or information that you don’t want to share publicly.
Then:
- Go to your SGUK member profile.
- Open Social Activity.
- Upload your photograph of the route plan to the activity wall.
- Add the hashtag #SGUKChallenge78 to your post.
- Share it for verification.
Your evidence should show your planning rather than encourage you to take risks outdoors. You don’t need to publish your home address, precise personal location or other sensitive information.
Challenge 78 Checklist
Want to Push Yourself?
Create a second route through a different type of terrain, such as a familiar network of public paths or a well-marked woodland trail where night access is permitted. Compare the two plans and decide which would be easier to navigate after dark and why.
You could also ask an experienced navigator to review your checkpoints and contingency plan. See whether they can identify any gaps you missed, particularly places where several paths meet or where a landmark may be difficult to recognise in poor visibility.
The aim is to become more deliberate about navigation before darkness removes the visual clues you normally take for granted.
What’s Next?
Once you’ve completed this challenge, you can explore other SGUK Outdoor Skills Challenges to develop your practical outdoor knowledge. Challenges can be completed in any order, so choose one that suits your experience and the skills you want to practise next.
Once you’ve shared your evidence and it has been verified, the SGUK Outdoor Skills Challenge 78 is complete and the completed challenges figure will be updated on your profile.
🔒Ready to test your survival skills?
Join Survival Guides UK for free, complete challenges, earn badges and increase your Survival Level.
JOIN FREE →
CRAIG BURR
FOUNDER · SURVIVAL GUIDES UK
I'm Craig, the person behind Survival Guides UK. I created SGUK because I wanted somewhere people could learn real outdoor skills in a practical, straightforward way — from lighting a fire and tying knots to navigation, campcraft and everything in between.
You can read more about the story behind SGUK here as well as our approach here.